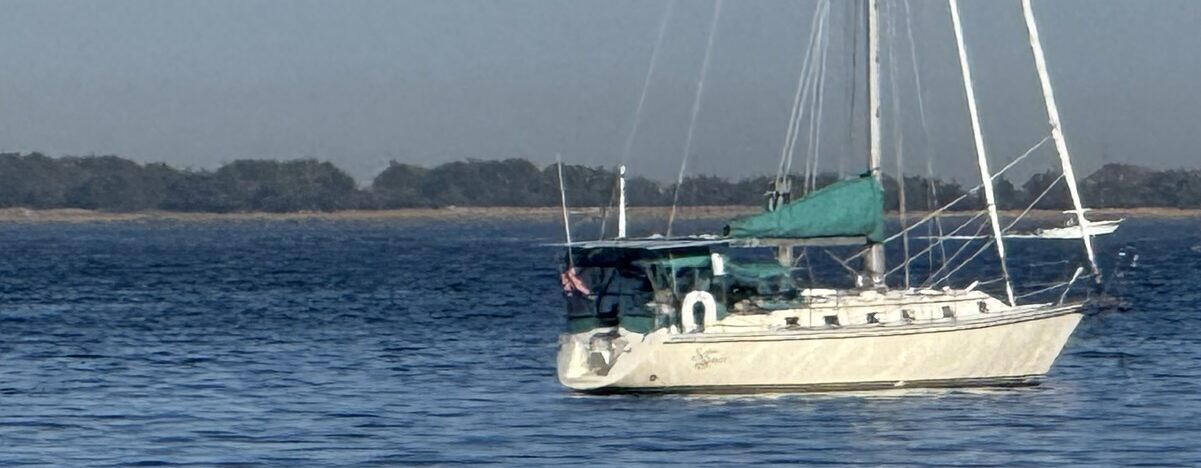
Last weekend, June 12-13, I didn’t leave the dock with Sans Souci as there were a few projects on my list I wanted to get through. One of the projects required some concentrated time on land. If we can start back a couple of days, Thursday evening, I asked my dad to come over to help with a project. As I sailed home from Fishers Island on Sunday, I noticed that the Windex was moving back and forth a little bit and was at risk of detaching from the masthead. The Windex is the wind vane at the top of the mast that gives a great visual clue to the direction of the apparent wind when sailing. I’ll tell you now that this is my least favorite spot on the boat. I have an active imagination and find it hard to ignore thoughts of halyards breaking, bodies tumbling, etc. As a precaution, I used two halyards to get up the mast. Dad cranked me up the spinnaker halyard (I had been using it recently and know it holds way more than my weight) and I put my climbing descender/belay device on a spare halyard so I could control my descent in the event of a catastrophe. I attached to my harness a bag full of tools, which were all tied to the bag, and ascended the 48 feet with John using my electric winch handle for the job. He hoisted me all the way to the very top of the mast where I could reach the offending loose screw. I cursed the tiny screw as I put the necessary half-turn on it to reset the Windex. Before descending, I inspected the rest of the masthead-mounted equipment and all seemed to be in order. As I came down the mast, I inspected other attachments such as the staysail, shrouds, spreaders, and the radar. With everything else seeming to be ship shape, I finally alighted back on the deck smiling and a little sweaty.
To make it possible for me to go up the mast solo in the future, I have ordered 31 folding mast steps. I’ll have another large project to install them, but afterward, I will be able to climb the mast without needing someone to hoist me. I have also ordered two rope ascenders that I’ll use as safety devices if I slip from the steps.
Saturday, with adventures aloft behind me, I set to my next, and largest weekend project. The dinghy is an old Avon Rover with an inflatable keel and floor. While the main tubes in the dinghy hold air well, the floor and keel do not. I had previously used soapy water to see if I could detect from where the air was leaking but I couldn’t find the offending spots. I decided then to resolve the issue in a more permanent way; to build a sold keel and floor for the tender. My original plan was to use a sheet of plywood with PVC pipe molded to the perimeter to protect the Hypalon (the material the inflatable tube are made from.) I had planned to have the floor in two or three pieces so I could more easily stow it when on long passages. It’s best to have the dinghy put away on longer trips and not tow it as it becomes another source of potential problems at sea. There are thousands of lost dinghies floating around the world’s oceans at any moment in time and I do not want to contribute.
A trip to Home Depot for the materials laid waste to my original plans. I could not find an adequate material to rejoin the cut pieces of plywood so I figured I’d make the floor out of one solid piece and stow it lashed to the deck on longer voyages. I may revisit this decision in the future, but for now, this is how I’m going. The construction process further altered my original plans. I could not get the PVC pipe to bend to the shape very well at all. I heated it with a heat gun to the point of melting and it still would not behave as I had envisioned. After some thought on the problem, I arrived at a simple solution. I had already planned to use, and had purchased, carpeting for the top of the new deck. My solution was to wrap the carpeting around the sides of the decking to make a padded edge.
First coat of marine paint curing
The next part of the project was to match the shape of the original keel and fabricate it out of a more rigid material. I elected to use 3″ schedule 40 PVC pipe for the job. This time, I was able to successfully bend the pipe and I created a shape that was close enough to the original. I marked the spot for the bend, heated the pipe with my heat gun and then wedged it under my car for leverage. Voila, a reasonable facsimile of the original. To fill the space between the deck and the top of the now curved pipe, I used scraps of plywood from the piece used for the deck. This seemed like a good idea since I was loathe to throw any plywood away- this 4×8 sheet of 19/32″ thick BCX plywood was about $90! I used construction adhesive to attach the wood to the pipe and I hope that this will hold up over time.
I used contact cement to adhere the carpet to the twice painted wood which seemed to work well.
Finished floor and keel
I got up early on Monday to fit the parts together with the dinghy. After a bit of struggle, I concluded that the keel was too long and I cut a couple of inches off the aft end. I had to deflate the main tubes pretty far to get the floor to insert under them. Once I had it all where I wanted it, I re-inflated the tubes and felt satisfied with the end result.
On Sunday, as I was waiting for paint to cure, I took at look at the water maker aboard Sans Souci. Installed is a 2007 Village Marine Little Wonder Water Maker that has been sitting idle for at least 5 years. The previous owners had no need for the water maker as they did not cruise extensively and the nearly 200 gallon tankage was always adequate. I suspect it will be adequate for me, too, but I want the option to make water if I need it. After reading the manual over a few times, I jumped in by starting the water maker. First of all, this system is very complex and has all sorts of settings for flushing with salt water, flushing with fresh water, making product water that goes overboard and, finally for sending desalinated water into the fresh water holding tanks. As you might image, the initial start up was a little worrisome for me as I am completely unfamiliar with water makers in general and this one in particular. I set my goal to be able to ascertain if the pumps worked and that there were no leaks in the system.
As a short primer on how water makers work, they operate using the principle of osmosis. Under normal pressures, if you put a semi-permeable membrane between salty water and fresh water, osmosis says the salt ions will move from area of more concentration (the salty side) to the area of less concentration (the fresh side). Since we are trying to go the other way, the only way to do that is to put the salt water under pressure to force it through the membrane while having it leave its salt ions behind. This requires a tremendous amount of pressure to work– far beyond any pressures you’ll find on any common marine pumps. The Village Marine model on Sans Souci generates 800 PSI on the supply side. I was worried that there would be leaks from that part of the system. I also was concerned about starting it up and accidentally contaminating all of the water already on Sans Souci, and, more critically, contaminating the tanks themselves.
After triple checking all of the valve settings, I started the system in salt flush mode, the odor emitting from the system was atrocious! There had been water sitting in parts of the system for over 5 years and it was… not fresh. I saw there were no leaks and waste water seemed to be flowing appropriately overboard. I put the system in fresh water flush mode and that further cleared parts of the system. Finally, I ran the desalinator pump at incrementally higher pressures, all the way to 800 PSI and no leaks. I did this in the mode of sending product water overboard. I’m pleased there were no leaks and the system and the next step will be to replace the prefilters and test the output of the system.
I did grow a little concerned about the water aboard and if I had back-flushed anything at all so I decided to flush the fresh water tanks aboard. They were both low and it was not a big project to pump them out and refill.
To the inconvenience of all my dock neighbors, the next project was to sort out the anchor chain. Sans Souci has 160 feet of chain with another 150 feet of rope attached. The chain, I had noticed while setting anchor doesn’t feed very smoothly and it certainly doesn’t pile smoothly under the windlass. I ran all of the chain out in an effort to remove any twists in the system. It turned out that the chain was twisted thrice and, hopefully, untwisting it will make it easier to set anchor in the future.
My final effort of the weekend was a bit of a vanity project, to be honest. I’ve often returned to the boat after sunset and wished she had a little light in the cockpit. I went to a local discount place called Ocean State Job Lot and bought some solar powered Christmas lights and a couple of solar garden lights to dress her up at night. I ran the Christmas lights around the inside of the bimini and put the garden lights in the tops of the cabin top winches. I like the way she now twinkles at night.
Next weekend, my brother, Robbie has generously agreed to come up from New Jersey to keep our mother fed, entertained and to open the jars she can’t one handed. John and I plan to sail to Hadley Harbor over by Woods Hole on Saturday, spend the night and return Sunday. Sunday weather looks to be for a stiff breeze and we may see our first sustained 30 knots, if the forecast holds. It’ll be good to see how Sans Souci performs under those conditions and a lot of fun to spend some time with my dad on Father’s Day.
{"id":null,"mode":"button","open_style":"in_modal","currency_code":"USD","currency_symbol":"$","currency_type":"decimal","blank_flag_url":"https:\/\/www.gilpatric.me\/wp-content\/plugins\/tip-jar-wp\/\/assets\/images\/flags\/blank.gif","flag_sprite_url":"https:\/\/www.gilpatric.me\/wp-content\/plugins\/tip-jar-wp\/\/assets\/images\/flags\/flags.png","default_amount":1000,"top_media_type":"featured_image","featured_image_url":"https:\/\/www.gilpatric.me\/wp-content\/uploads\/2021\/05\/EFB0789C-BF66-4202-A59D-42885F7080D6-scaled-200x150.jpeg","featured_embed":"","header_media":null,"file_download_attachment_data":null,"recurring_options_enabled":true,"recurring_options":{"never":{"selected":true,"after_output":"One time only"},"weekly":{"selected":false,"after_output":"Every week"},"monthly":{"selected":false,"after_output":"Every month"},"yearly":{"selected":false,"after_output":"Every year"}},"strings":{"current_user_email":"","current_user_name":"","link_text":"Leave a tip","complete_payment_button_error_text":"Check info and try again","payment_verb":"Leave a Tip","payment_request_label":"Sailing Sans Souci","form_has_an_error":"Please check and fix the errors above","general_server_error":"Something isn't working right at the moment. Please try again.","form_title":"Sailing Sans Souci","form_subtitle":null,"currency_search_text":"Country or Currency here","other_payment_option":"Other payment option","manage_payments_button_text":"Manage your payments","thank_you_message":"Thank you, I am very grateful for your support!","payment_confirmation_title":"Sailing Sans Souci","receipt_title":"Your Receipt","print_receipt":"Print Receipt","email_receipt":"Email Receipt","email_receipt_sending":"Sending receipt...","email_receipt_success":"Email receipt successfully sent","email_receipt_failed":"Email receipt failed to send. Please try again.","receipt_payee":"Paid to","receipt_statement_descriptor":"This will show up on your statement as","receipt_date":"Date","receipt_transaction_id":"Transaction ID","receipt_transaction_amount":"Amount","refund_payer":"Refund from","login":"Log in to manage your payments","manage_payments":"Manage Payments","transactions_title":"Your Transactions","transaction_title":"Transaction Receipt","transaction_period":"Plan Period","arrangements_title":"Your Plans","arrangement_title":"Manage Plan","arrangement_details":"Plan Details","arrangement_id_title":"Plan ID","arrangement_payment_method_title":"Payment Method","arrangement_amount_title":"Plan Amount","arrangement_renewal_title":"Next renewal date","arrangement_action_cancel":"Cancel Plan","arrangement_action_cant_cancel":"Cancelling is currently not available.","arrangement_action_cancel_double":"Are you sure you'd like to cancel?","arrangement_cancelling":"Cancelling Plan...","arrangement_cancelled":"Plan Cancelled","arrangement_failed_to_cancel":"Failed to cancel plan","back_to_plans":"\u2190 Back to Plans","update_payment_method_verb":"Update","sca_auth_description":"Your have a pending renewal payment which requires authorization.","sca_auth_verb":"Authorize renewal payment","sca_authing_verb":"Authorizing payment","sca_authed_verb":"Payment successfully authorized!","sca_auth_failed":"Unable to authorize! Please try again.","login_button_text":"Log in","login_form_has_an_error":"Please check and fix the errors above","uppercase_search":"Search","lowercase_search":"search","uppercase_page":"Page","lowercase_page":"page","uppercase_items":"Items","lowercase_items":"items","uppercase_per":"Per","lowercase_per":"per","uppercase_of":"Of","lowercase_of":"of","back":"Back to plans","zip_code_placeholder":"Zip\/Postal Code","download_file_button_text":"Download File","input_field_instructions":{"tip_amount":{"placeholder_text":"How much would you like to tip?","initial":{"instruction_type":"normal","instruction_message":"How much would you like to tip? Choose any currency."},"empty":{"instruction_type":"error","instruction_message":"How much would you like to tip? Choose any currency."},"invalid_curency":{"instruction_type":"error","instruction_message":"Please choose a valid currency."}},"recurring":{"placeholder_text":"Recurring","initial":{"instruction_type":"normal","instruction_message":"How often would you like to give this?"},"success":{"instruction_type":"success","instruction_message":"How often would you like to give this?"},"empty":{"instruction_type":"error","instruction_message":"How often would you like to give this?"}},"name":{"placeholder_text":"Name on Credit Card","initial":{"instruction_type":"normal","instruction_message":"Enter the name on your card."},"success":{"instruction_type":"success","instruction_message":"Enter the name on your card."},"empty":{"instruction_type":"error","instruction_message":"Please enter the name on your card."}},"privacy_policy":{"terms_title":"Terms and conditions","terms_body":null,"terms_show_text":"View Terms","terms_hide_text":"Hide Terms","initial":{"instruction_type":"normal","instruction_message":"I agree to the terms."},"unchecked":{"instruction_type":"error","instruction_message":"Please agree to the terms."},"checked":{"instruction_type":"success","instruction_message":"I agree to the terms."}},"email":{"placeholder_text":"Your email address","initial":{"instruction_type":"normal","instruction_message":"Enter your email address"},"success":{"instruction_type":"success","instruction_message":"Enter your email address"},"blank":{"instruction_type":"error","instruction_message":"Enter your email address"},"not_an_email_address":{"instruction_type":"error","instruction_message":"Make sure you have entered a valid email address"}},"note_with_tip":{"placeholder_text":"Your note here...","initial":{"instruction_type":"normal","instruction_message":"Attach a note to your tip (optional)"},"empty":{"instruction_type":"normal","instruction_message":"Attach a note to your tip (optional)"},"not_empty_initial":{"instruction_type":"normal","instruction_message":"Attach a note to your tip (optional)"},"saving":{"instruction_type":"normal","instruction_message":"Saving note..."},"success":{"instruction_type":"success","instruction_message":"Note successfully saved!"},"error":{"instruction_type":"error","instruction_message":"Unable to save note note at this time. Please try again."}},"email_for_login_code":{"placeholder_text":"Your email address","initial":{"instruction_type":"normal","instruction_message":"Enter your email to log in."},"success":{"instruction_type":"success","instruction_message":"Enter your email to log in."},"blank":{"instruction_type":"error","instruction_message":"Enter your email to log in."},"empty":{"instruction_type":"error","instruction_message":"Enter your email to log in."}},"login_code":{"initial":{"instruction_type":"normal","instruction_message":"Check your email and enter the login code."},"success":{"instruction_type":"success","instruction_message":"Check your email and enter the login code."},"blank":{"instruction_type":"error","instruction_message":"Check your email and enter the login code."},"empty":{"instruction_type":"error","instruction_message":"Check your email and enter the login code."}},"stripe_all_in_one":{"initial":{"instruction_type":"normal","instruction_message":"Enter your credit card details here."},"empty":{"instruction_type":"error","instruction_message":"Enter your credit card details here."},"success":{"instruction_type":"normal","instruction_message":"Enter your credit card details here."},"invalid_number":{"instruction_type":"error","instruction_message":"The card number is not a valid credit card number."},"invalid_expiry_month":{"instruction_type":"error","instruction_message":"The card's expiration month is invalid."},"invalid_expiry_year":{"instruction_type":"error","instruction_message":"The card's expiration year is invalid."},"invalid_cvc":{"instruction_type":"error","instruction_message":"The card's security code is invalid."},"incorrect_number":{"instruction_type":"error","instruction_message":"The card number is incorrect."},"incomplete_number":{"instruction_type":"error","instruction_message":"The card number is incomplete."},"incomplete_cvc":{"instruction_type":"error","instruction_message":"The card's security code is incomplete."},"incomplete_expiry":{"instruction_type":"error","instruction_message":"The card's expiration date is incomplete."},"incomplete_zip":{"instruction_type":"error","instruction_message":"The card's zip code is incomplete."},"expired_card":{"instruction_type":"error","instruction_message":"The card has expired."},"incorrect_cvc":{"instruction_type":"error","instruction_message":"The card's security code is incorrect."},"incorrect_zip":{"instruction_type":"error","instruction_message":"The card's zip code failed validation."},"invalid_expiry_year_past":{"instruction_type":"error","instruction_message":"The card's expiration year is in the past"},"card_declined":{"instruction_type":"error","instruction_message":"The card was declined."},"missing":{"instruction_type":"error","instruction_message":"There is no card on a customer that is being charged."},"processing_error":{"instruction_type":"error","instruction_message":"An error occurred while processing the card."},"invalid_request_error":{"instruction_type":"error","instruction_message":"Unable to process this payment, please try again or use alternative method."},"invalid_sofort_country":{"instruction_type":"error","instruction_message":"The billing country is not accepted by SOFORT. Please try another country."}}}},"fetched_oembed_html":false}


 To make it possible for me to go up the mast solo in the future, I have ordered 31 folding mast steps. I’ll have another large project to install them, but afterward, I will be able to climb the mast without needing someone to hoist me. I have also ordered two rope ascenders that I’ll use as safety devices if I slip from the steps.
 Saturday, with adventures aloft behind me, I set to my next, and largest weekend project. The dinghy is an old Avon Rover with an inflatable keel and floor. While the main tubes in the dinghy hold air well, the floor and keel do not. I had previously used soapy water to see if I could detect from where the air was leaking but I couldn’t find the offending spots. I decided then to resolve the issue in a more permanent way; to build a sold keel and floor for the tender. My original plan was to use a sheet of plywood with PVC pipe molded to the perimeter to protect the Hypalon (the material the inflatable tube are made from.) I had planned to have the floor in two or three pieces so I could more easily stow it when on long passages. It’s best to have the dinghy put away on longer trips and not tow it as it becomes another source of potential problems at sea. There are thousands of lost dinghies floating around the world’s oceans at any moment in time and I do not want to contribute.
 First coat of marine paint curing
 Finished floor and keel


Gunnel-to-gunnel dinghy sole (floor) carpeting, starting a new trend in dinghy enhancements. I marvel at Hugh’s ingenuity.
Thats a perfect Father’s Day gift, Hugh, and I know John will love it. He certianly deserves it.